# Contact Button Installation
# Introduction
Follow the steps below to easily add the Contact Button to your website. We recommend to read this documentation entirely.
# Prerequisites for first time users
We assume that by now you've already:
- Picked a plan (opens new window).
- Added your domain (opens new window).
- Completed your registration by clicking the verification link in your mail.
- Are logged into the Tools Dashboard (opens new window).
# Copy the script for your domain
- In Tools Dashboard (opens new window), click on Contact Button to view your domain(s).
- Edit the desired domain by clicking the far right edit icon .
- Click the Get Code button and copy the script.
# Add the Contact Button script to your website
There are a few ways to add the Contact Button to your website.
- Via Google Tag Manager (GTM).
recommended - Adding the script manually.
- Using the Wordpress Simple Custom CSS and JS Plugin (opens new window).
# Google Tag Manager (GTM) implementation
First of all, it is important to mention that we assume that you already:
- Have a Google Tag Manager (opens new window) account
- You have created a container for your website in GTM and,
- You have added the GTM code to your website as required: Tag Manager Help #6103696 (opens new window)
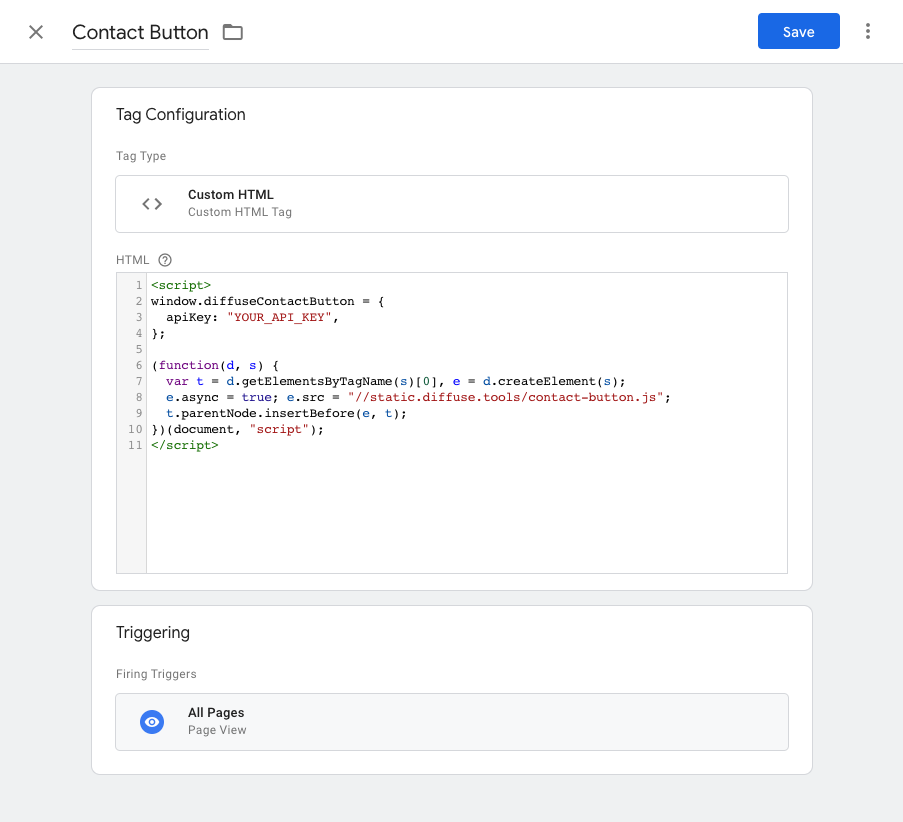
Create a new tag in your GTM container via Tags New and select Custom HTML under Tag Configuration. Then paste the script below into the HTML field.
Select All Pages at Triggering. This will load the script and therefor the Contact Button on all pages. If you want to load the Contact Button only on certain pages, configure the trigger to do so.
# Add the script manually
The script can be placed basically anywhere in the source code of your website. Preferable right before the </body> closing tag to prevent render blocking resources.
If you're a webdeveloper yourself, this might be an easy way to add the Contact Button to your website.
# Using a Wordpress Plugin
There are a number of plugins that allow you to add script tags directly to the source code of your website.
One that's really easy to use is the Simple Custom CSS and JS (opens new window) plugin.
- Install the plugin on your website.
- Go to Custom CSS & JS Add Custom JS.
- Name your script and paste the copied code. At Where on page, select Footer.
The Contact Button will now be visible on your website.
# Configure the Contact Button
In this last step, we explain how you can adjust the Contact Button's styling and text options.
- Login to the Tools Dashboard (opens new window).
- Go to Cookie Notice and Edit your domain.
- Scroll down to the various sections to configure your Cookie Notice.