# Cookie Notice Installation
# Introduction
This guide walks you through how to implement the Cookie Notice into your website. We recommend to read this documentation entirely.
v1.0 docs
If you are using v1.0 of our Cookie Notice, click here (opens new window) to consult to the corresponding documentation.
# Prerequisites for first time users
We assume that by now you've already:
- Picked a plan (opens new window).
- Added your domain (opens new window).
- Completed your registration by clicking the verification link in your mail.
- Are logged into the Tools Dashboard (opens new window).
# Get the script for your domain
- In Tools Dashboard (opens new window), click on Cookie Notice to view your domain(s).
- Edit the desired domain by clicking the far right edit icon .
- Click the Get Code button and copy the script.
# Google Tag Manager (GTM) implementation
First of all, it is important to mention that we assume that you already:
- Have a Google Tag Manager (opens new window) account
- You have created a container for your website in GTM and,
- You have added the GTM code to your website as required: Tag Manager Help #6103696 (opens new window)
Create a new tag in your GTM container via Tags New and select Custom HTML under Tag Configuration. Then paste the script below into the HTML field.
Select All Pages at Triggering. This will load the script on all pages.
Later in this manual we explain how you can adjust the text and styling of the Cookie Notice.

Click Save to save the Tag.
IMPORTANT NOTE
This step alone is not enough. Continue reading how to create the right triggers in GTM and load the cookies based on the users preference.
If you don't want to use GTM, you can also add the script yourself to the <head> of your website.
# Create triggers in GTM
You then have to define the logic in GTM to place the correct cookies based on the preferences of the user. To do this, you create the following three triggers in GTM.
- cookieconsent_marketing
- cookieconsent_preferences
- cookieconsent_statistics
Create the first trigger via Triggers New. Name the trigger Cookie Consent Marketing.
At the Trigger Configuration, select Custom Event. The name of this event is cookieconsent_marketing. It is important that this name is exactly the same.
Click Save to create the trigger.
The trigger now looks like this:
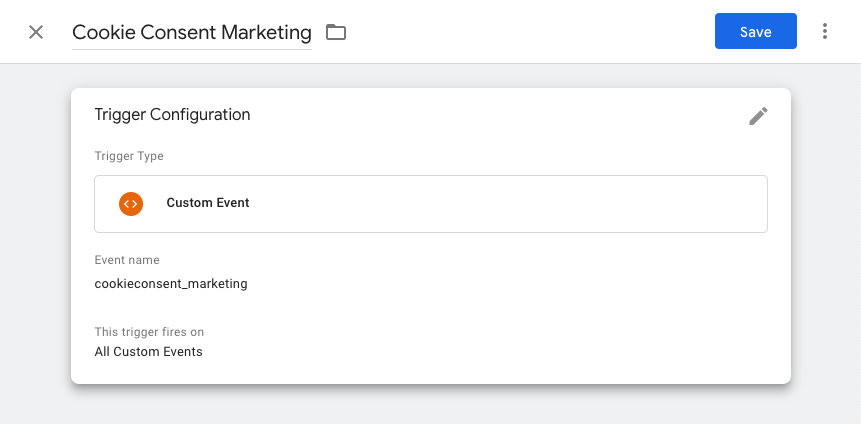
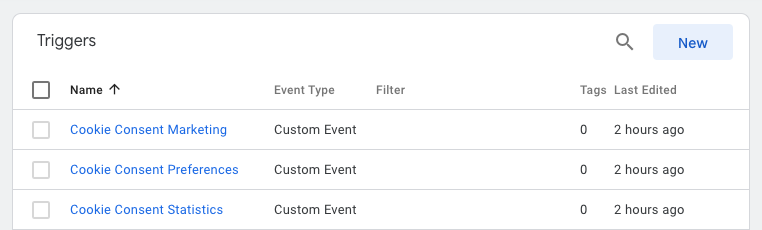
Repeat the above for each type of cookies so that you have the three triggers named cookieconsent_marketing, cookieconsent_preferences and cookieconsent_statistics.
You may not need all triggers. Check our Frequently Asked Questions (opens new window) (question 5) which different type of cookies your website uses.
# Loading cookies based on the GTM triggers
You then need to load the scripts that place cookies on your websites via the triggers you just created. We will show you how to do this using these two common scripts, Google Analytics and Facebook Pixel:
Google Consent Mode V2
Google released Google Consent mode V2.
Scroll down to the next section of this manual for more instructions.


Repeat the above for the other scripts that your website loads.
You now have easy control over the different types of cookies that your website loads based on the user's preferences.
IMPORTANT NOTE
It is important that all scripts that place cookies on your website are loaded via Google Tag Manager. This means that you no longer load any scripts directly into your website.
# Google Consent Mode V2
Our Cookie Notice also supports Google Consent Mode V2 (opens new window). This allows your Google tags (Analytics, Ads, Floodlight) to dynamically adjust based on the consent status of your users. Here's how to set this up.
Add the consent script to your website
Make sure the script below is placed in the <head> of your website, before you load the Google Tag Manager script.
<!-- Google Consent Mode -->
<script>
window.dataLayer = window.dataLayer || [];
function gtag() {
  dataLayer.push(arguments);
}

gtag('consent', 'default', {
  ad_storage: "denied",
  ad_user_data: "denied",
  ad_personalization: "denied",
  analytics_storage: "denied",
  functionality_storage: "denied",
  personalization_storage: "denied",
  security_storage: "granted",
  wait_for_update: 2000,
});

gtag("set", "ads_data_redaction", true);
gtag("set", "url_passthrough", true);
</script>
<!-- End Google Consent Mode -->
After this, you need to set or adjust your Google Analytics (or Ads) tag so that it's being triggered on All Pages and not by one of the consent triggers. Otherwise Google will not receive the necessary pings for accurate measurement.
Click on Save to create or update the tag.
Then click on Submit in the top right corner of the main screen to publish the changes.
Useful resources:
# Add a link to change the cookie settings
According to the new GDPR cookie law it is mandatory that users can change their cookie settings at any time. To do this, add a link to your website. A good place is in the privacy statement or footer of your website. The link must have the class diffuse-cookie-settings:
<a href="#" class="diffuse-cookie-settings">Change Cookie Settings</a>
When visitors click this link, the cookie consent modal will open.
# Configure the Cookie Notice
In this last step, we explain how you can configure the cookie settings, texts and styling.
- Login to the Tools Dashboard (opens new window).
- Go to Cookie Notice and Edit your domain.
- Scroll down to the various sections to configure your Cookie Notice.
# Cookie Settings
- Select which type of cookies your website uses.
- Optionally, you can set the Cookie domain. This is useful if you want to use the Cookie Notice on (multiple) subdomains.

# Texts & Translations
In this section you are able to manage the texts of the cookie notification.
- If you're on a Pro-plan, you are able to add translations. When you set the language to auto-detect, the document language will be used.
- Enter the Title and Notice texts. These will show on the cookie banner.
- Enter the URL of your website's Privacy Statement.
- Add the intro text which is shown when users open the cookie consent settings modal.
- Next, add descriptive texts about the different types of cookies.
- Optionally, you can change the several button texts.

# Styling options
Finally, your are able to configure the behavior and appearance of the Cookie Notice to make it fit perfectly into your website.
You have full control over text, background and button colors, as well as layouts, positioning, etc.
If you choose not to edit the styling options, the Cookie Notice will use default values.
When you're done editing, click the Save button on the top right. The Cookie Notice will automatically update on your website.
FINAL NOTE
Are there any uncertainties after reading this manual? Or can we be of service with another design / development issue? Feel free to contact us via support@diffuse.tools.
* If you use the cookie notification correctly, you comply with the GDPR legislation. We are web developers, not lawyers, if you use this script you always remain responsible. We are in no way liable.